| Getting Started |
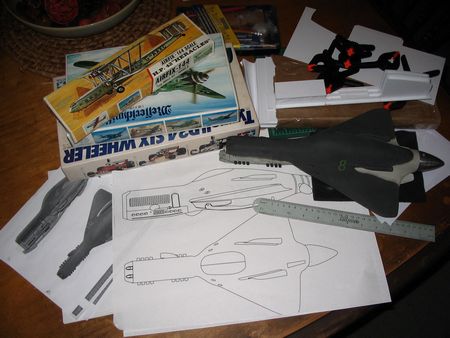
Blue prints are drawn so it's time to take a team photo before we begin!
I've tossed in a Gustav for scale.
|
|
| Re-start |
Recently I received the donor part for the cockpit insert (nod to Jason). The dimensions raised a few engineering issues.
I wasn't too far along so I decided it would be easier to re-start vs re-engineer.
Rather than start with an overall frame and work from the outside in, I opted to build around cockpit part and work from the inside out.
The approach seems to be working out well (So far!). A photo of the first approach can be found here.


(Above) These little cubes are great for holding things in place and keeping them plumb. I pinched them from one of my daughters lego-variant sets.
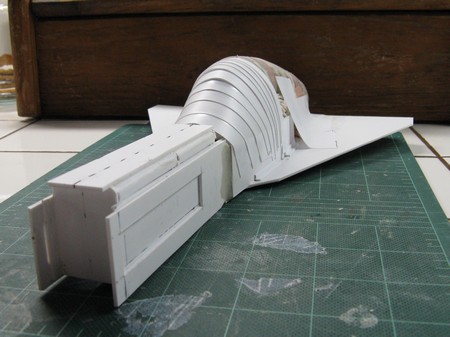
| | Ugly Phase |
This is the ugly phase when putty, bondo and styrene plastic are slapped together ;-)
The upper hull will be hollow, so paper towel is rolled into balls and jammed in side the epoxy/styrene mess.


|
| One Prop or Two? |
Mark originally wanted a dual-prop design. So I've been experimenting.


|
|
| Slip, Slop, Slap |
Spent the week 'skinning' the upper hull by applying the first layer of epoxy to the upper hull.
The curves came out pretty close the first time around, even so they're deceptively complex with the combination of straight edges, curves and bevels.
I expect a lot of tweaking (epoxy-sand-epoxy-sand...)


(Below) Scaled diagrams versus in-progress.


|
|
|
|
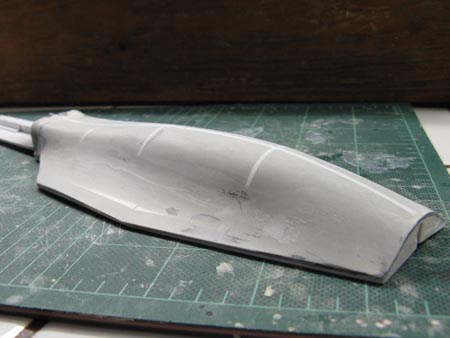
| Upper Hull (again) |
Tweaks, tweaks and more tweaks. Down to the sub-millimeter sculpting - getting everything "just right". Here are some overall shots.


|
| Inside |
Carved out the inside. Before and After shots. Started lining the interior with epoxy.


|
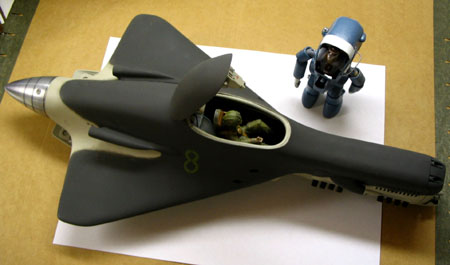
| Overall |
Nose is too squarish. Will work on rounding the top corners so they taper more and hide the rectangular shape.


|
|
| Engine louvres |
Minor diversion to figure out how I'm going to reproduce the louvres.
Proof of concept: steel punch, epoxy die, .02" styrene.
I pressed the punch into the curing epoxy and moved it around to create a larger hole - space for the punched material.
The steel punch comes from 1/8" stainless flat bar, shaped on the grinder and finished with a bastard file and wet/dry paper.
Concept seems to work ok and will try on sheet aluminium to see how that goes. I think pre-cutting the slit will help too.


|
| Here be thy nose |
Aluminium tube is just an indicator to show how the gun barrels will stick out - they end up recessed inside the nose cowling.
The patches of styrene represent an experiment with a wider nose - by only a couple millimeters but it looked to chunky so I
striped the styrene back and patched on extensions to restore the original dimms.
At the base of the nose is a channel for the front landing gear (in shadow).
Either side of the channel is a socket to accept the exhaust port panels.

|
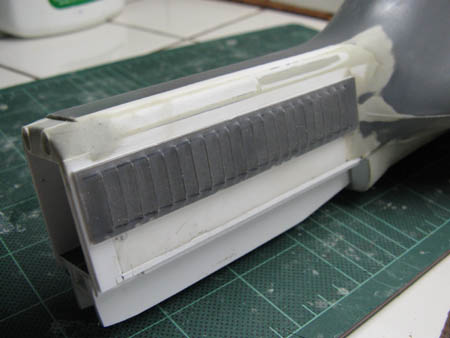
| Not more Louvres |
Found the best approach is pre-slitted clear plastic, the kind of plastic used on Barbie Doll packaging.
This is not the ordinary thin Barbie box plastic. It is the heavy duty stuff which comes from the all-plastic package.
Its tough but elastic.
Tested on a small sample, louvres spaced 5mm apart.
Seemed to work ok, so I went with 4mm spacing on a longer piece which will be the basis of the final part (below).


I took some extra pics of the process so I'll flog this louvre thing a little more and post a DIY about it later.
Meanwhile, there is another louvre tutorial on the web which uses styrene quarter-round rod.
This is a hassle in my humble opinion if you want a hollowing opening because you have to glue, slice and scoop each louvre.
But then again, not everyone has flat steel bar lying around or a grinder to make the punch.
You can find the styrene tutorial here.
|
|
|


