|
| Rivet Tool |
| Overview |
I created a rivet tool to detail my Falke garage kit and it's received a lot of interest so here's how to make one.
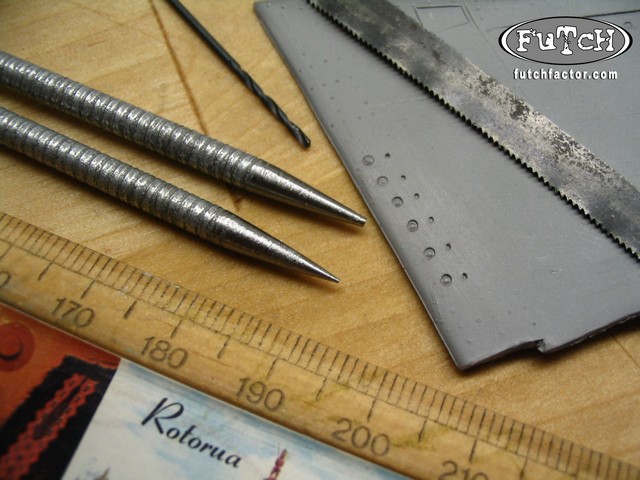
It's fairly simple - just a 3.5 inch nail with a concave tip (bowl) and rubber wine cork handle.
Takes about 10 minutes to make one at home, but the result is very precise rivets.
I've tried various techniques - pin heads, putty, melted sprue, styrene rod etc,
but I found this to be the easiest way to crank out rivets in bulk with good accuracy.
The tool can fabricate domed or flush rivets too.
Domed rivets require a pilot hole with a nub of styrene that gets squashed into shape.
Flush rivets are made by pressing the tool directly into the surface material.
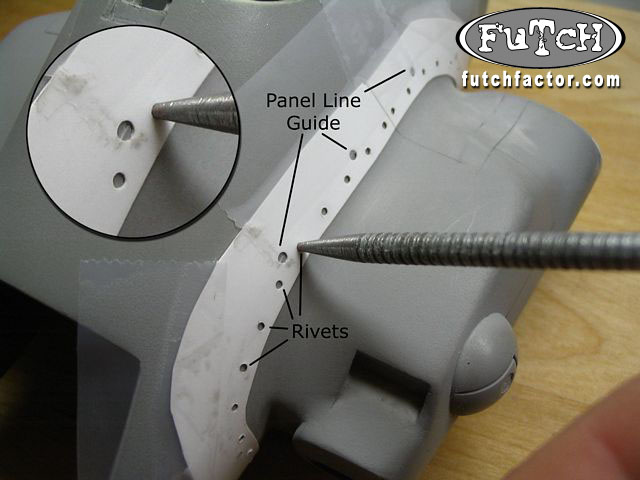
A hacksaw blade can be used as a guide to create a line of rivets too (any serrated edge will do, even the metal strip from a box of cling wrap).
Rivet scale depends on what you need and how small your drill bits are. For the Falke, I went with a 1mm diameter because it matched the Nitto MaK/SF3D aircraft kits.
|
| Making The Tool |
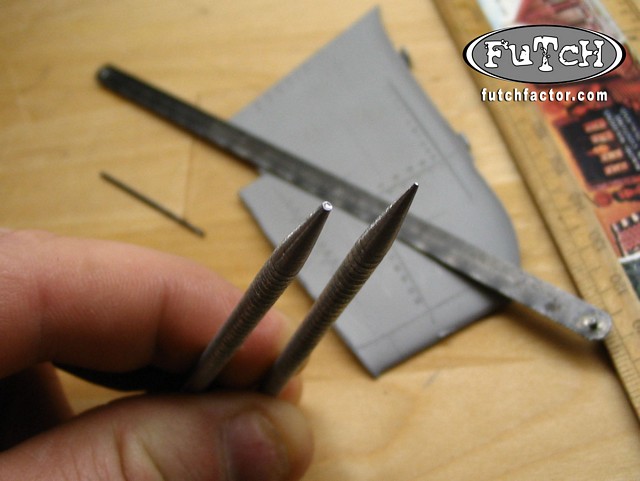
- Bench grind the nail into a fine point.
- Pinch the tip with 400 grit wet-dry paper and twist the nail back and forth to smooth out the cone shaped point.
- Grind the tip flat, down to the cross-sect diameter for your rivet
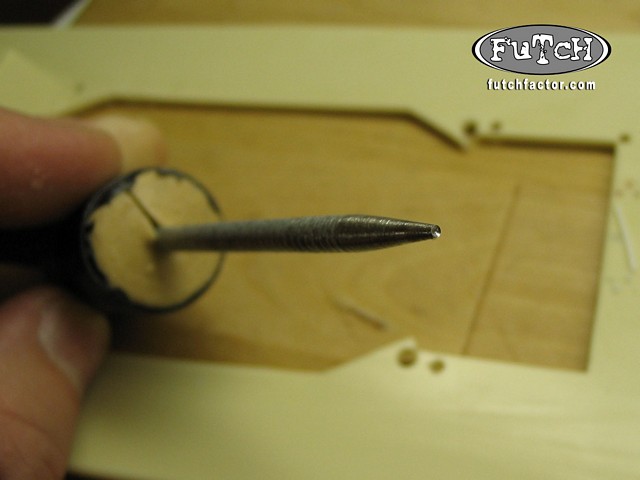
- To help position the drill bit, score the center of the flat tip with a sharp exacto knife.
- Pin-vise/finger twist the drill bit using the score as a guide.
- Knock the edges back a little with 600 grit - the tip is pretty sharp otherwise ;-)
- Find a rubber wine cork, make a vertical slice halfway up, halfway deep. Embed the nail and tape it up.
Tip: To create a wider groove around the rivet, use a drill-bit with a small diameter than the rivet.
|
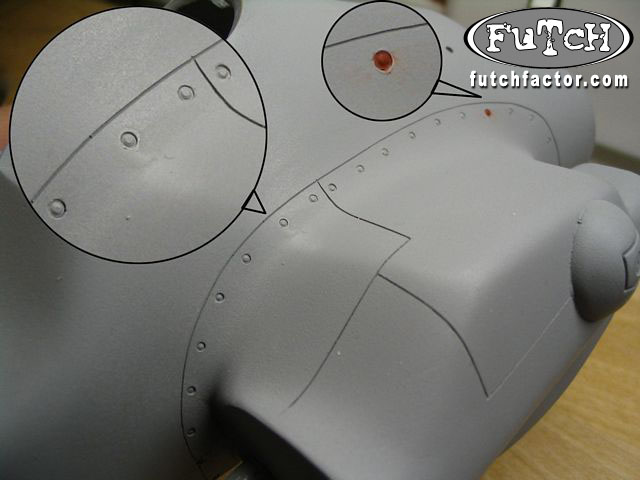
| Flush Rivets |
- Pencil-in the rivet locations with a ruler or flexible hack-saw blade. Hasegawa also sell rivet guides.
- Center the tip of the tool over the pencil mark,and press firmly enough to create a very minor indent.
- While maintaining contact with surface, rock the tool in a circular motion, gradually increasing pressure.
Note:
- When working with cured/hardened putty, take care not to overwork the rivet otherwise the putty material will compress and flake off.
- If a rivet happens to flake off, clean out the loose material, place a small amount of putty into the hole and re-do the rivet with the softer material.
|
| Domed Rivets |
Domed rivets are slightly more complicated but follow the same shaping process as flush rivets.
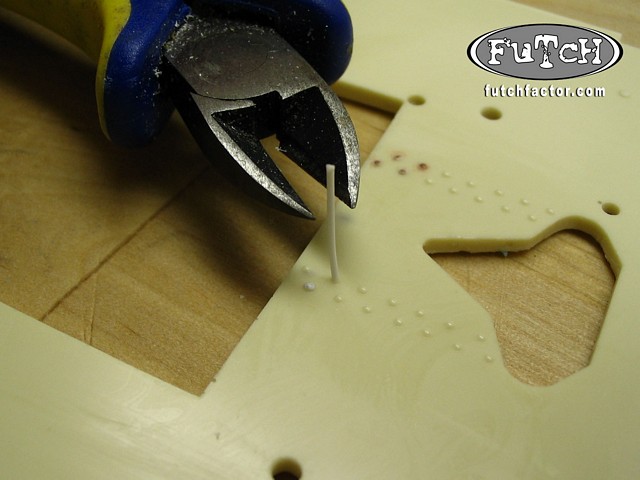
You'll need styrene rod (0.5mm), super glue, pin vise and small drill bit.
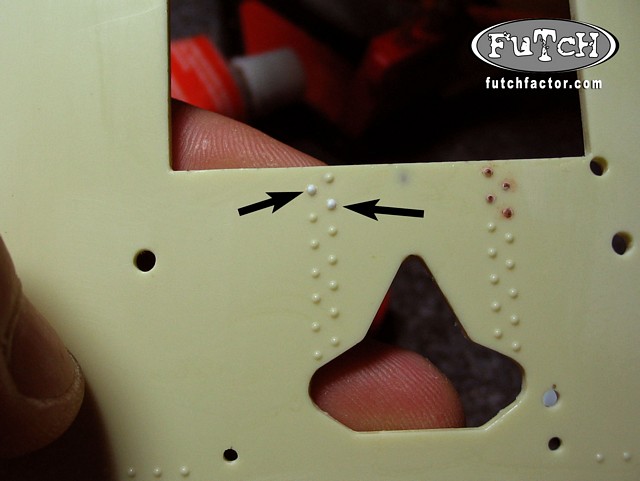
- Pencil-in the rivet locations and drill out a small pilot hole for each.
- Take a length of styrene rod, coat one end with Super Glue and insert into the pilot hole.
- With pliers, cut the styrene rod slight above the surface. Leave enough sticking out for shaping the dome.
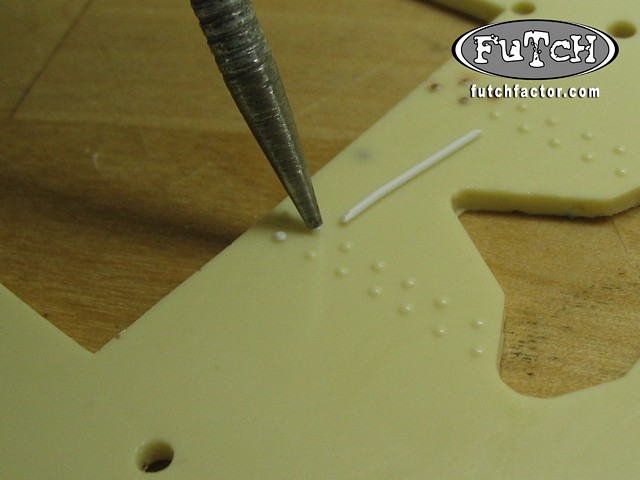
- Place the rivet tool over the styrene nub and press down, rocking the rivet the tool in a circular motion.
- Continue to twirl, twist and rock the rivet tool until you achieve the desired domed rivet.
- Use the outer edge of the rivet tool tip to slice off excess styrene.
|
|
| Alternative to all that |
| Jewellers Beading Tool |
Save yourself all this trouble and go buy a set of Jewellers beading tools.
I did...A set contains about 20 different diameters...You will find them on Ebay for about $15.

|
|

|
|